

Ever felt like your phone’s running out of space way too fast just when you need it most? You try deleting photos, clearing cache, uninstalling apps you actually like, but nothing seems to help. It’s frustrating when your device keeps warning you about low storage, especially when you know you have an SD card sitting there doing almost nothing.
If you’re wondering how to move apps to SD card on any Android phone (step-by-step), you’re in the right place. This guide will walk you through everything you need to know clearly, simply, and with no tech jargon. Whether your phone has built-in options or needs a little workaround, you’ll learn exactly how to free up space and get your phone running smoother again.
Things to know before moving forward
Not all Android phones let you move apps to an SD card anymore. This feature used to be common, but now it’s mostly limited to budget or mid-range phones if they even have an SD card slot at all. And even if your phone supports SD cards, it doesn’t always support moving apps to them.
Another thing to know is that app developers have to allow their apps to be moved, and most don’t. Some phones do offer a way to use your SD card as internal storage, but that comes with trade-offs like needing the card to stay in the phone at all times and not being able to use it on another device without reformatting.
What to know about adding storage
Before you try to move apps to SD card, it’s important to know that not all Android phones support this feature. High-end or newer models often don’t allow it, while it’s more commonly available on midrange and budget devices that actually need the extra space.
Even if your phone does support it, not every app will let you move it. Some larger apps like games still store most of their data on internal storage. For example, Asphalt 8 only shifts a small portion to the SD card. That said, if you have a lot of apps, moving the ones you can will still help free up space and improve performance.
Important Information On How to Move Apps to SD card
Before you start moving apps, there are a few things you should know. Not all Android phones support moving apps to an SD card this feature is more common on budget or mid-range devices, and often missing from high-end models with large internal storage.
Also, not every app can be moved, even if your phone allows it. Some apps are designed to keep most of their data on internal storage, so you may only be able to move parts of them or not at all. Still, moving the apps that do allow it can help you save a noticeable amount of space.
How Do You Move Apps to SD Card on Android from Settings?
Moving apps to an SD card from Settings means using your Android phone’s built-in system menu to transfer supported apps from internal storage to your SD card to free up space.
Key Points
- ✅ This method works on most Android phones, especially Android 6.0 and above.
- ⚠️ Not all apps can be moved system apps and high-performance apps are usually restricted.
- 🔄 Even moved apps may still use some internal storage for key functions.
- 💾 The SD card must be properly inserted and formatted before starting.
- 📱 Steps:
- Go to Settings.
- Tap Storage or Storage & USB.
- Choose Apps or Manage Apps.
- Select the app you want to move.
- If available, tap Move to SD Card.
- Go to Settings.
- ⏳ The move may take a few minutes depending on app size.
- 📍 Once done, the app’s storage location will be changed to the SD card.
Method 1. Using the Application Manager
The Application Manager is a built-in feature on Android phones that can help you move apps to an SD card if your device and the app support it. The exact steps might look slightly different depending on your Android version, but the general process is the same.
Go to Settings > Apps, tap the app you want to move, then go to Storage. If the app can be moved, you’ll see a “Change” option under “Storage used.” Tap it, select your SD card, and hit Move.
Just keep in mind not all apps or Android versions allow this. If you don’t see the “Change” option, it means the app or your device doesn’t support it, and you’ll need to try a different method.
How to move apps to an SD card on Android
Moving apps to an SD card on Android is usually easy, but it doesn’t work for all apps. Some phones or app developers block this feature, and certain manufacturers may remove the option entirely. So, whether or not you can move an app depends on your device and the app itself.
Move Android apps to SD card
- Open the Settings app.
- Tap on Apps.
- Choose the app you want to move.
- Tap Storage.
- If supported, tap Change under Storage used.
- Select SD card.
- Tap Move to start the transfer.
- The app will be moved to the SD card.
Note:
- You can move the app back to internal storage later using the same steps.
- Steps may vary slightly depending on your phone model and Android version.
How to move apps to an SD card using an application manager
- Open the Settings app on your phone.
- Go to the Apps section.
- Select the app you want to move.
- Tap on Storage.
- If the app supports it, tap the “Change” button.
- Choose SD card as the new storage location.
- Tap Move to start the transfer.
- If the Change option isn’t there, your phone or the app doesn’t support moving to SD card.
- You can move the app back to internal storage later using the same steps.
Method 2. Format SD Card as Internal Storage
One way to move apps to SD card is by turning the SD card into internal storage using a feature called Adoptable storage, available on Android devices starting from Android Marshmallow. This lets your phone treat the SD card as part of its internal memory, so apps and data can be stored across both spaces automatically. It’s a great option if your phone doesn’t support moving apps through standard settings.
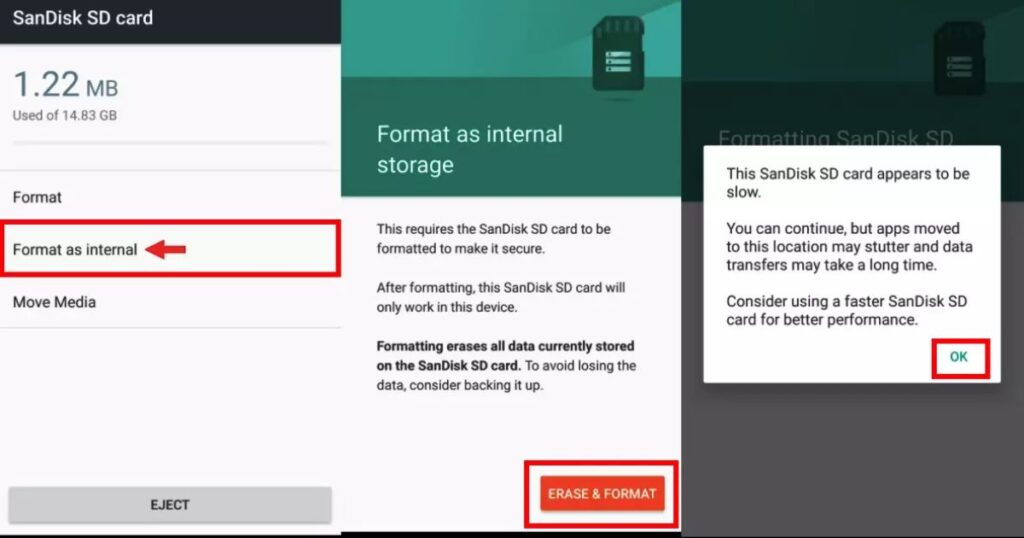
Before you begin, keep in mind that formatting the SD card will erase everything on it, so you should back up your files first using Google Drive is an easy way to do this. Once you insert the card, your phone should show a setup prompt. You can then choose to use the SD card as internal storage, or go to Settings > Storage, select the SD card, and tap Format as internal or Erase & Format, depending on your Android version.
After setup, the SD card becomes encrypted and locked to your phone, meaning you can’t use it on another device unless you reformat it again. You’ll also need to keep the SD card in the phone at all times, or some apps might stop working. While this method can help you move apps to SD card more effectively, it’s not supported by all phones some brands like Samsung may not offer this feature.
Use an SD card as internal storage
Some Android phones allow you to treat an SD card as internal storage. This combines the SD card with your phone’s internal memory, so apps and files are stored automatically without needing to manage space manually.
There are some important downsides to this method. The SD card becomes locked to the phone and can’t be used on other devices unless it’s reformatted. Removing the card may cause a factory reset. Slower SD cards can also affect performance, so using a fast one is important. Not all phones support this feature, even when they include expandable storage.
Adopt an SD card the easy way:
Insert the microSD card into your Android phone.
If your phone supports it, a notification will appear asking how to use the SD card.
Choose the option to adopt it as internal storage.
This process will format and encrypt the SD card.
Once adopted, the SD card can only be used with that phone unless reformatted.
How to adopt an SD card from the settings:
Insert the microSD card into your Android phone.
Open the Settings app.
Go to Storage.
Tap on the SD card you just inserted.
Tap the three-dot menu in the top corner.
Select Storage settings from the menu.
Tap Format.
If available, choose “Format another way” for more options.
Confirm the formatting to prepare the SD card as internal storage.
How to use an SD card as internal storage
To move apps to SD card using a different method, there’s a feature called Adoptable Storage, introduced in Android Marshmallow. This lets the system treat the SD card as part of the phone’s internal storage. It’s useful when the regular move option isn’t available. Brands like Motorola, Huawei, and Nvidia support this feature, while Samsung and LG often don’t.
Before using Adoptable Storage, it’s important to know a few things. A high-speed SD card is needed look for Class 10, UHS-I, or UHS-3 ratings to maintain good performance. The process will erase all data on the card, and once formatted, it can’t be used in other devices unless reformatted. Removing the SD card later will break access to apps and files moved there.
For devices that support it, this is a powerful way to move apps to SD card and expand usable storage but it comes with some important limitations.
Bonus: How to Use an SD Card as Internal Storage
You can turn your SD card into part of your phone’s internal storage, which lets you store apps, app data, and media files on it just like the phone’s built-in memory. To do this, you’ll need to format the SD card through your device settings. Once formatted, your phone will treat the card as internal storage, and it will automatically move apps and data onto it.
🔑 Key Points:
- Go to Settings > Storage > SD Card
- Tap “Format as Internal Storage”
- Confirm when prompted this will erase all data on the card
- After formatting, the SD card will act like part of your internal memory
- Apps and their data will be moved over automatically
Using a third-party app
If the usual phone settings don’t let you move apps to your SD card, a third-party app might help. One popular option is AppMgr III (formerly App 2 SD), which you can find on the Google Play Store.
However, even these apps can’t move every app some apps just aren’t allowed to be moved, no matter what tool you use. Third-party apps are most useful when your phone doesn’t support app transfers anymore, but some of your apps still do.
Part 2. Problems of Moving Apps to SD Card
Some apps can’t be moved to an SD card, and that can be frustrating. You might notice the “Move to SD card” option is missing or greyed out. This usually happens because of how the app was built or how your phone handles storage. It’s a common issue that many Android users run into.
Reason 1. Developer Choice

One big reason you can’t move apps to SD card is because the app’s developer didn’t allow it. Android gives developers the choice to enable or disable this feature, and many simply choose to keep their apps locked to internal storage.
Why? Well, if an app is moved to an SD card and the card is removed or not working properly, the app might crash or disappear. Most developers want their apps to always be available and avoid negative reviews from confused users. So to keep things running smoothly, they often turn off the option to move their apps to SD cards.
Reason 2. Specified Functions
Some apps can’t be moved to an SD card because they use specific system features that require them to stay on your phone’s internal storage. This is done to prevent problems with how the app works.
These features include:
- Account Managers
- Alarm Services
- App Widgets
- Broadcast Receivers (e.g., for “boot completed”)
- Device Administrators
- Input Method Engines (like keyboards)
- Live Wallpapers
- Background Services
- Sync Adapters
How to Move Unmovable Apps to SD Card
Just because an app won’t move to your SD card by default doesn’t mean you’re stuck. If you really need to move it, there are two methods that can help you force all or part of the app onto the SD card even if the developer didn’t allow it.
Method 1. Copy or Move Files and Folders
When moving an entire app isn’t possible, it’s still effective to transfer media files, downloads, and other data to an SD card using a third-party app. One commonly used option is Files To SD Card, available for free on the Google Play Store.
After installation, the app displays a list of transferable folders and files. The user selects the desired content, grants permission for SD card access, and the app begins the transfer process. While this method doesn’t move the app’s core system files, it can significantly help to free up internal storage space.
Method 2. Rooted method
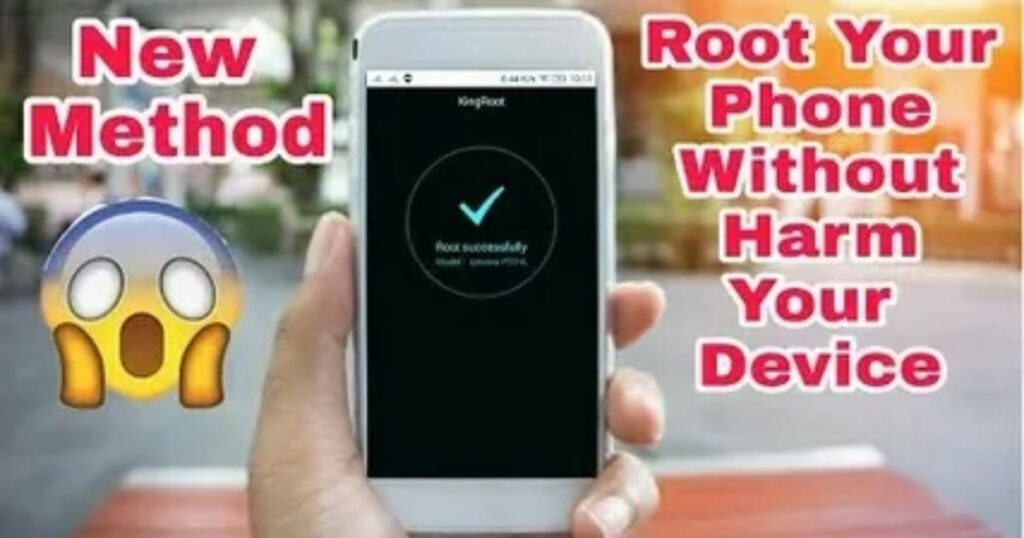
In cases where certain applications cannot be moved to the SD card through standard methods, rooting the device may provide a solution. Rooting grants administrator-level access, allowing the user to bypass restrictions set by developers, manufacturers, or carriers, and enables advanced app management capabilities.
However, rooting carries significant risks. It voids the device warranty and, if done incorrectly, can result in the phone becoming non-functional (commonly referred to as “bricking”). Proper research and caution are essential before proceeding.
Several free tools are available for rooting, including KingoRoot, iRoot, King Root, FramaRoot, and Towel Root. Once the device is successfully rooted, an app such as Link2SD can be installed. This app utilizes root access to move applications to a designated section of the SD card.
To support this function, the SD card must be partitioned using a tool like Parted. One partition should use the FAT32 file system for general data, while the second partition should be formatted in ext2, ext3, ext4, or f2fs for application data. After rebooting the device, Link2SD can then be used to relocate apps to the SD card using the new partition structure.
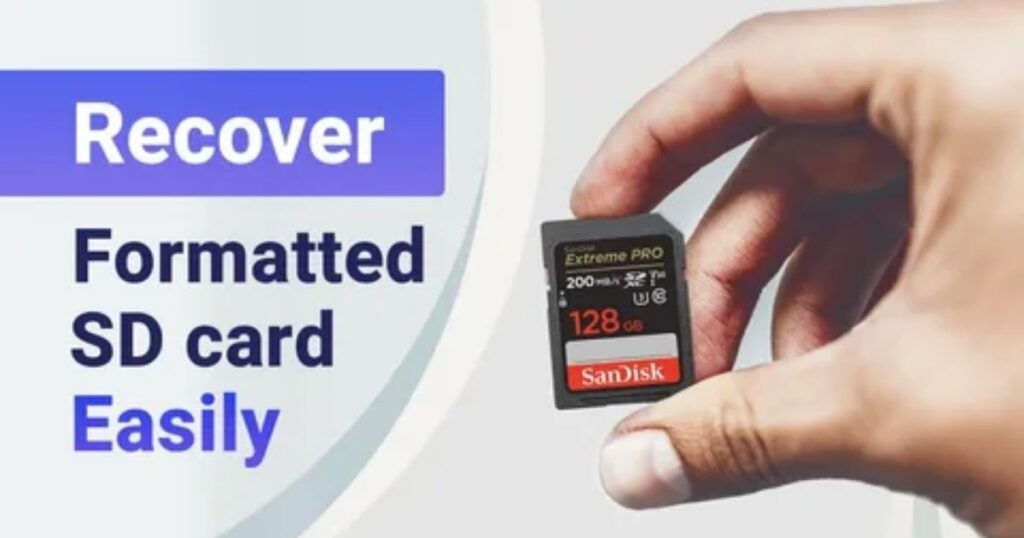
Part 3. How to Recover Lost Files from SD Card?
Accidentally formatting or modifying an SD card while trying to move apps to SD card can sometimes lead to file loss. That’s why it’s always smart to back up data before using advanced features like adoptable storage, rooting, or partitioning tools.
When files go missing, the best first step is to stop using the SD card immediately to prevent overwriting any recoverable data. A trusted tool like Wondershare Recoverit can help recover lost files quickly. The process is simple: connect the SD card to a PC, open the software, and follow three steps select the card, scan for deleted files, and preview before recovering them. This method is reliable for bringing back important photos, videos, and documents after unexpected loss during a move apps to SD card process.
Read More: Technology Falcon
SD Card Recovery
- Recovers deleted or lost data from SD cards safely and completely
- Works in over 500+ data loss scenarios (e.g., crashes, partition loss, human error)
- Supports recovery of 1,000+ file formats
- Maintains original quality during recovery
- Has a high success rate for file restoration
Part 4. Pros and Cons of Moving Apps to SD Card
Moving apps to an SD card can help free up space, especially on older or budget phones with limited internal memory. However, it comes with several downsides that you should know before making the switch.
Performance is a big issue. Most SD cards are slower than your phone’s internal storage, so you may notice apps lagging or running slower. This is especially true for games or heavy apps unless you’re using a high-speed card rated A2 or Class 10.
Some features may stop working properly. After moving apps, you might lose shortcuts, widgets, or saved passwords especially when you restart your phone. Also, files may become harder to find or even get duplicated, especially if your phone doesn’t fully integrate the SD card as part of its internal memory.
SD cards wear out faster when used as internal storage because they handle more read and write activity. This can shorten their lifespan significantly.
If you switch phones, it’s tricky. SD cards used as internal storage are encrypted and locked to your current device. You can’t just pop the card into a new phone without formatting it and that erases everything.
Gaming and app updates aren’t smooth either. Games may not perform well from the SD card, and during updates, apps often get moved back to internal storage, meaning you might need to move them again manually.
How to Move Apps to SD Card on Android by Coolmuster Android Assistant
If you want to simplify the transfer process, especially when moving multiple apps at once, Coolmuster Android Assistant is a reliable solution. This desktop tool allows you to move apps to your SD card directly from your computer, making it perfect for users who need efficient app management.
Key features include:
- Batch Transfer Apps: Move several apps to the SD card in one go, saving time and freeing up internal storage.
- Manage App Data: Install and uninstall Android apps directly from your PC.
- Backup & Restore: Easily back up and restore important data like contacts, messages, and call logs.
- File Management: Transfer and manage photos, videos, music, and more between your phone and computer.
- User-Friendly Interface: Designed for all users, no technical skills required.
To get started:
- Download and install Coolmuster Android Assistant on your Windows or Mac computer.
- Connect your Android phone via USB or Wi-Fi and follow the on-screen instructions.
- Once connected, click on “Apps” in the left panel.
- Select the apps you want to move, click “Export,” and choose your SD card as the destination.
How to Transfer Apps to SD Card on Android Through AppMgr III
AppMgr III, also known as App 2 SD, is a popular and easy-to-use app that helps you move supported apps from your phone’s internal storage to the SD card. It’s designed to help manage your storage better by showing which apps can be moved.
To use it, just download AppMgr III from the Google Play Store, open the app, and tap on “Move app”. The app will filter and show you only the apps that are eligible for transfer. Then, select the ones you want and tap “Move to SD Card”.
Keep in mind, not all apps or phones support this feature, so it might not work for everything. But for supported devices and apps, it’s a quick and helpful tool to free up space.
Read More: Technology Falcon
FAQ’s
How to move apps from internal storage to SD card?
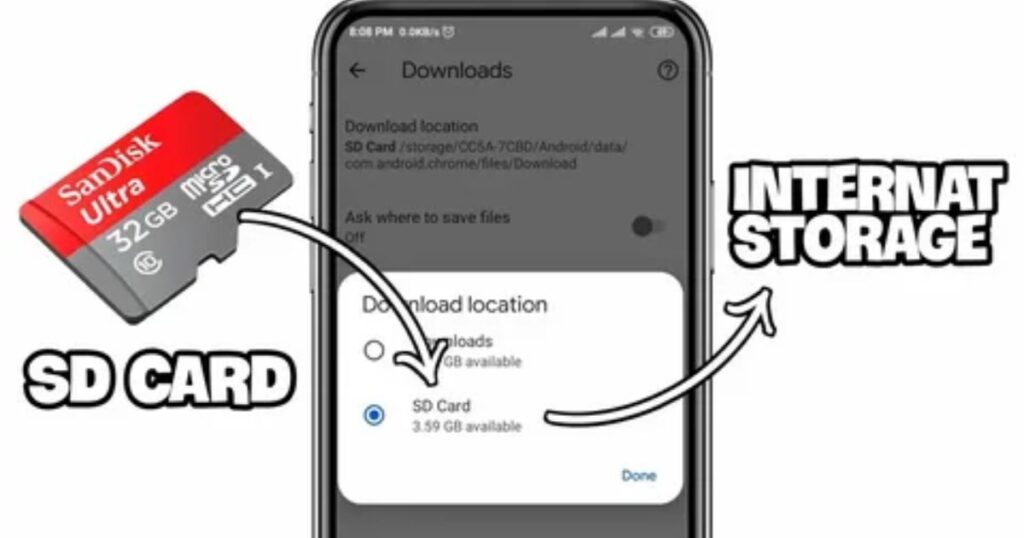
You can move apps to SD card by going to Settings > Apps > Storage > Change > Select SD Card.
How to set SD card as default storage for apps?
Some Android phones allow you to format the SD card as internal storage to make it the default.
Why can’t you move apps to SD card anymore?
Many apps and newer Android versions don’t support external transfers due to performance and security limits.
Do app updates affect apps stored on the SD card?
Yes, some apps may move back to internal storage after updates and need to be moved again.
Can I move all app data to the SD card or just parts of it?
You can usually only move parts of the app; core files often stay on internal storage.
Conclusion
Running low on storage doesn’t mean deleting useful apps is the only option. Knowing how to move apps to SD card offers a smart way to free up space and improve performance. This simple step helps clear internal memory while keeping favorite apps right where they belong ready to use without slowing things down.

I’m Rana Waseem, an SEO blogger with a passion for creating content that ranks and drives results. With a deep understanding of search engine optimization and keyword strategy, I help businesses and readers discover valuable information through well-researched, engaging blog posts. My goal is to simplify SEO for everyone while staying ahead of the latest trends in digital marketing