

Ever tried to visit a website and suddenly got hit with the message “DNS Address Could Not Be Found”? It’s frustrating you’re just trying to do something simple, and now you’re stuck with a technical error that makes no sense. You refresh the page, check your internet, even restart your device.. still nothing. Why does this happen out of nowhere?
In this blog, you’ll find exactly what you need to fix the problem. We’ll break down what the error means, why it shows up, and give you easy, step-by-step solutions that actually work. Whether you’re using Chrome, Windows, Android, or anything else this guide has you covered.
What is the “Server DNS address could not be found” error?
This error usually shows up when your device can’t connect to the right server for the website you’re trying to visit. There are a few common reasons for this. The site itself might be temporarily down, in which case there’s nothing you can do except wait or let the website owner know. Another reason could be problems with your DNS server it might be misconfigured or not working properly. Lastly, your device might be using outdated or incorrect IP address info from your local cache, which can also trigger the error.
Variations of the issue
This error can show up in different ways depending on your browser or device. Some common versions include:
- DNS Address Could Not Be Found
- DNS_PROBE_FINISHED_NXDOMAIN
- The site can’t be reached
- Server IP address could not be found
- DNS lookup failed
All of these messages mean the same basic thing: your browser can’t turn the website’s name into an IP address, which is needed to load the site.
Understanding the server IP address could not be found error
This error happens when your browser can’t locate the website’s server because it failed to translate the domain name into an IP address. Normally, this is done through a DNS lookup a process that works like the internet’s phone book, matching web addresses to their server locations.
When the DNS lookup doesn’t work, you’ll see an error like “Server IP address could not be found” or “DNS_PROBE_FINISHED_NXDOMAIN.” Common reasons include the website being offline, issues with cached data on your device, or problems with the DNS server you’re using.
Reasons why this error occurs
This error usually happens when your device can’t connect to a DNS server to find the website’s IP address. One common reason is that the DNS server is down or not working properly. Sometimes, your own DNS settings might be wrong especially if you’ve manually entered ones that no longer function.
It can also be caused by stored cache data that’s outdated or incorrect, which confuses your system when trying to reach a site. Firewalls or security programs may block DNS requests without you realizing it. In some cases, the issue comes from your internet provider, especially if their DNS servers are having problems.
How Do DNS Servers Work?
DNS servers help your browser find the exact location of a website. When you type a web address like electric.ai, your browser asks the nearest DNS server for its matching IP address basically, the number behind the name. The DNS server sends back the IP, and your browser uses it to load the website.
If the DNS server isn’t working, your browser can’t find that number, so the site won’t load and you’ll see an error instead. Knowing this process helps you understand why DNS issues cause connection problems.
How to Fix “Server DNS address could not be found” in Google Chrome
When you see the “Server DNS address could not be found” error in Chrome, it means your browser can’t match a website’s name to its correct IP address. Normally, DNS servers handle this process automatically in the background translating the web address you type into something your computer understands. But if there’s a DNS issue, Chrome won’t be able to reach the site, and you’ll get this error instead.
The good news is that this problem is usually simple to fix. The original content highlights that this guide will walk you through several methods to solve it quickly and get you back online.
Use Google DNS
If the DNS server isn’t working properly, switching to Google’s Public DNS can help fix the issue. Google’s DNS is free, reliable, and often faster. You’ll need to change it manually through your device’s Network Connections settings.
To do this, go to Network & Internet settings, select your connection (like Ethernet), then open adapter options. Right-click your connection, choose Properties, and find Internet Protocol Version 4 (TCP/IPv4). From there, set the DNS to 8.8.8.8 and 8.8.4.4, then save the changes. Reopen Chrome and check if the error is gone.
Clear Chrome Host Cache
If the “Server DNS address could not be found” error is caused by a Chrome extension, clearing the browser’s host cache might fix it. To do this, open Chrome in Incognito mode by clicking the three dots and selecting “New incognito window” or pressing Ctrl + Shift + N.
Then, in the address bar, type chrome://net-internals/#dns and press Enter. On that page, click the “Clear host cache” button. This may help resolve the DNS error quickly.
Reset Your IP And Clear DNS Cache
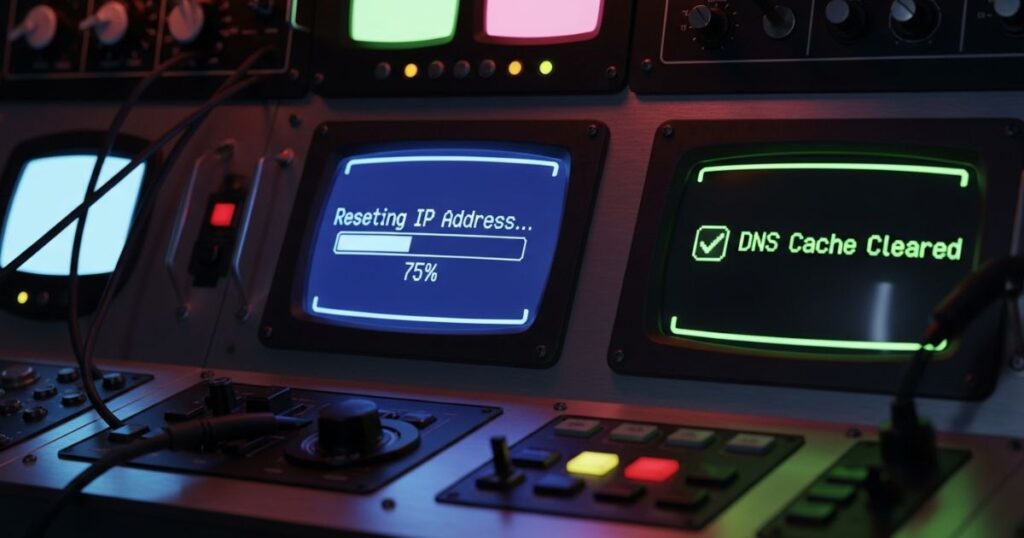
To fix the “Server DNS address could not be found” error, you can reset your IP settings and clear the DNS cache using simple Command Prompt commands. You’ll need to open Command Prompt as an administrator search for it, right-click, and choose “Run as administrator.”
Then, enter the following commands one by one, pressing Enter after each:
- netsh int ip reset
- netsh winsock reset
- ipconfig /release
- ipconfig /renew
- ipconfig /flushdns
Once done, restart your computer. This process resets network configurations and clears any cached DNS data, which often resolves the issue.
Restart DNS Client Service
The DNS Client service helps your computer remember and register website names (DNS) more quickly. Restarting this service can sometimes fix the “Server DNS address could not be found” error. To do this, open the Run box by pressing Win + R, type services.msc, and press Enter. In the window that opens, find DNS Client, right-click it, and choose Restart. This refreshes how your computer handles DNS names and may solve the issue.
How I Fixed the “Site Can’t Be Reached” Error on Android
To fix the “DNS could not be found” error on Android, start by clearing your browser history, which can sometimes resolve loading issues. You can also try setting up a secure DNS like Google or Cloudflare to improve connection reliability. If that doesn’t help, manually selecting your network settings or using a VPN may solve the problem. These steps are simple and usually get the error fixed quickly.
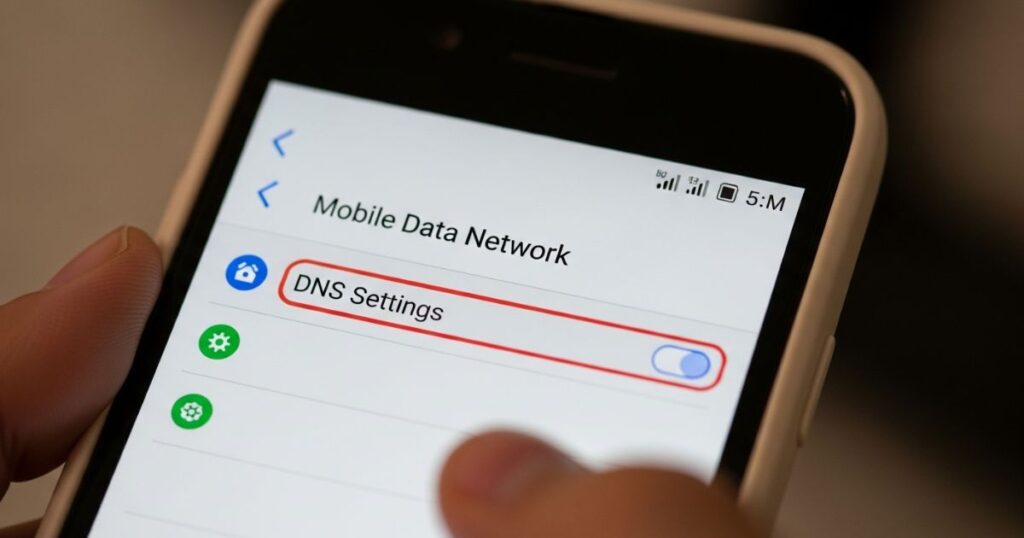
Use Secure DNS
- Open your browser and tap the three-dot menu in the top-right corner.
- Go to Settings > Privacy and Security > Use secure DNS.
- Select “Choose another provider”.
- Click the Customize dropdown.
- Choose OpenDNS from the available options.
Manually Choose Your Network
Go to Settings on your phone.
Tap SIM card & mobile networks.
Select your mobile network provider.
Tap Mobile networks.
Turn off the “Automatically select network” option.
Follow the prompts to manually choose your preferred network.
Use a VPN
To fix the issue, you can try using a reliable VPN app like Turbo VPN. Just install it from the Play Store, open the app, and tap the connect button. When prompted, allow the connection. The VPN might help you access the website that wasn’t loading before.
Read More: Technology Falcon
21 Jun Mastering the Mysteries of DNS: 5 Steps to Fix DNS Address Could Not Found Android
If you’re using an Android device and suddenly see the message “DNS address could not be found”, it can feel frustrating and confusing. But there’s no need to panic. The article explains that this issue is common and can usually be fixed with a few simple steps. It introduces a 10-step process to help you understand the problem and solve it quickly, so you can get back online without stress.
Step 1: Double-Check Your Connection

Before trying any advanced fixes, make sure your internet connection is actually working. Check if your Wi-Fi or mobile data is turned on and connected properly. This might seem like a small step, but it’s often the reason behind the “DNS Address Could Not Be Found” error. A stable, active connection is the first thing you need before moving on to more technical solutions.
Step 2: Airplane Mode Shuffle
Switching Airplane Mode on and off can quickly reset your device’s network connection. This simple step helps refresh the DNS settings and may fix temporary issues blocking internet access. It’s a fast way to give your connection a fresh start.
Step 3: Reboot, Reboot, Reboot!
Sometimes, the simplest fix is the best just restart your Android device. A quick reboot can clear out temporary bugs or glitches that may be causing the “DNS address could not be found” error. It gives your system a fresh start and often helps restore your internet connection without doing anything complicated. If things aren’t working right, restarting is a fast, easy first step worth trying.
Step 4: Flush DNS Resolver Cache
Flushing the DNS resolver cache on your Android device can help fix browsing issues caused by outdated or incorrect DNS records. It clears any saved DNS data that might be causing problems, making your internet connection smoother. You can do this with just a few quick steps in the developer settings no advanced skills needed.
Step 5: Update Your Android OS
If your Android device shows the “DNS address could not be found” error, it might be due to outdated software. Updating your Android OS can fix hidden bugs and improve overall performance. Just go to your device settings, find the system update section, and install any available updates. Keeping your software current helps prevent DNS issues and gives you a smoother, more secure browsing experience.
Advanced Troubleshooting Steps
1. Change DNS Settings for Mobile Data
If you’re facing DNS issues while using mobile data, switching DNS settings through a trusted app can help. Tools like DNS Changer or 1.1.1.1 by Cloudflare work by creating a VPN tunnel, which allows them to override your mobile network’s DNS.
Many users report that DNS problems on mobile are often caused by the provider’s DNS servers. Using these apps is a simple way to bypass those issues, especially when a website doesn’t load correctly due to missing DNS entries.
2. Update Network Configuration
To fix the issue, reset your network settings. This clears out saved Wi-Fi networks, mobile settings, and Bluetooth connections, giving your device a clean start. You can do this by going to Settings > System > Reset options > Reset Wi-Fi, mobile & Bluetooth.
Also, make sure your APN (Access Point Name) settings match what your mobile carrier requires. Some users on Reddit also recommend changing your DNS address to Google’s DNS in the network settings as a helpful fix.
3. Advanced Wi-Fi Configuration
To improve Wi-Fi stability and fix DNS issues, you can manually set a static IP address on your device. Start by going to your Wi-Fi settings, long-pressing the connected network, and selecting “Modify” or “Change Network.” Then enable “Advanced Options” and switch the IP setting to “Static.”
Once in static mode, manually enter an IP address within your router’s range, set the Gateway to your router’s IP, and use reliable DNS servers like Google DNS (8.8.8.8 / 8.8.4.4). If you can access your router settings, increasing the DHCP lease time can also help maintain a more stable connection.
4. Use Alternative DNS Services
If changing to Google DNS doesn’t solve the issue, trying other reliable DNS services might help. Many users recommend Cloudflare (1.1.1.1 / 1.0.0.1), OpenDNS (208.67.222.222 / 208.67.220.220), or Quad9 (9.9.9.9 / 149.112.112.112) as solid alternatives. These services are known for being fast, secure, and dependable. If you’re not sure which one to pick, using Google DNS is still a safe option.
5. System-Wide DNS Management
To manage DNS settings across your entire device, apps like Intra or Nebulo can help. These apps use DNS over HTTPS (DoH) to encrypt your DNS queries, which can fix DNS issues caused by your internet provider or local network restrictions.
How to fix the Server IP Address Could Not Be Found error
This error blocks you from accessing websites and can be pretty frustrating. The content explains that the issue usually ties back to problems with DNS settings, network configuration, or cached data. It highlights the importance of checking each possible cause step by step like clearing your DNS cache, restarting your router, or changing DNS servers. The main idea is to go through each fix one at a time to figure out what’s stopping your device from connecting properly.
Check firewall and security software
happen if the settings are too strict or not set up correctly. To fix it, open your security software and check the settings for allowed apps or network permissions. Make sure your web browser and DNS services are allowed through the firewall. After making changes, restart your computer to apply the updates.
Flush DNS cache

The DNS cache saves website addresses you’ve visited to help them load faster next time. But if this stored data becomes outdated or corrupted, it can cause DNS errors. Flushing the DNS cache clears this old info so your device can get fresh, correct data the next time you visit a site often fixing connection issues.
On Windows, you can flush the DNS by opening Command Prompt and typing:
ipconfig /flushdns
You’ll see a message confirming it worked.
On Mac, open Terminal and run:
sudo killall -HUP mDNSResponder
You’ll need to enter your admin password. There’s no confirmation message, but the command still works.
Release and renew your IP address
Your IP address works like your device’s digital name on a network, and sometimes it can cause connection problems especially if there’s a conflict or error. Releasing and renewing it is a quick way to refresh your network connection and can help fix DNS or internet issues.
On Windows, you can do this by opening Command Prompt and running three commands in order: ipconfig /release, ipconfig /flushdns, and ipconfig /renew. On a Mac, go to System Preferences > Network, choose your network, then click Advanced > TCP/IP, and hit “Renew DHCP Lease” to get a new IP. This simple step often clears up connection problems fast.
Include the site’s IP address in your hosts file
If DNS issues are blocking access to a website, you can try bypassing DNS altogether by manually adding the site’s IP address to your computer’s hosts file. This tells your system to connect directly to the IP instead of relying on a DNS server, which can help fix errors like “Server IP Address Could Not Be Found.”
On Windows, you’ll need to open Notepad as an administrator and edit the hosts file located at C:\Windows\System32\drivers\etc\hosts. Add a new line at the bottom using this format: IP_ADDRESS DOMAIN_NAME, for example, 93.184.216.34 example.com. Then save and close the file.
On Mac, open the Terminal and use the command sudo nano /etc/hosts. Add the domain and its IP at the bottom of the file using the same format, save the changes, and exit the editor.
Remove files from the “etc” folder
The etc folder in Windows holds important network files like the hosts file. Sometimes, these files get corrupted or outdated, which can cause DNS and network problems. To fix this, go to C:\Windows\System32\drivers\etc, make a backup of the folder, and then delete its contents. Start by removing recently added or temporary files. If the problem goes away, you can bring files back one at a time to find the one causing the issue.
Bring your network adapter driver up to date
If your network adapter driver is outdated or damaged, it can cause problems like websites not loading or DNS errors. Updating the driver helps your computer connect to the internet more smoothly and can fix issues like the “Server IP Address Could Not Be Found” error.
To update it, open Device Manager, go to Network adapters, right-click your adapter, and choose “Update driver.” Let Windows search for the latest version and install it. After that, restart your computer to apply the changes.
How To Fix DNS Server Unavailable
DNS problems can come from different sources like your browser, computer, router, or even your internet provider. If the issue is with your browser or router, you can usually fix it yourself. But if the problem is coming from your ISP or DNS server, it might take more time or require help from your provider.
Browser DNS Troubleshooting
Sometimes the issue isn’t with your DNS settings it’s actually your browser. First, try simply restarting the browser; this alone can often fix the problem. If that doesn’t work, clear the browser’s cache, as outdated or saved website data can block new DNS lookups. Still not working? Try a different browser like Chrome or Firefox to see if the issue is browser-specific. If the new browser works, update or reinstall the one that’s not. If none of these steps help, the problem might be with your device or router settings.
Computer DNS Troubleshooting
If your computer is having DNS issues, the first thing to check is the DNS settings. Make sure they match what your ISP or network admin recommends. If you’re using third-party DNS services like OpenDNS or Google DNS, double-check for any compatibility issues.
You should also try disabling firewalls or antivirus software temporarily, since they can block certain websites or IP addresses. If the internet works after disabling them, it may be a settings issue in those programs. Turn off any extra connections like Bluetooth or peer-to-peer features to avoid network conflicts.
Make sure your network adapter drivers are up-to-date, as outdated drivers can cause connection problems. It also helps to flush the DNS cache, especially if it’s storing outdated information. Lastly, if everything looks fine on your computer but you’re still getting errors, the problem might be with the router’s DNS settings so check there next.
ISP DNS Troubleshooting
Sometimes, your internet may stop working because of an issue with your ISP’s DNS servers. These servers help translate website names into IP addresses, and if they go down or get overloaded, you might see DNS errors.
To troubleshoot, first check if the ISP’s DNS servers are working by pinging their IP addresses. If some don’t respond, remove them or switch to different ones. You can try setting your system to automatically obtain DNS addresses, or contact your ISP for help. Also, if you’re on a VPN or work network, the issue might be coming from your company’s DNS server instead not the ISP.
How to Avoid DNS Issues
You can’t completely prevent DNS issues, but there are a few smart steps to lower the chances of facing them. Start by regularly clearing your DNS cache, especially if you switch between networks often.
Also, make sure your software, drivers, and devices are always up to date, and keep an eye on your network’s health and security. Running network diagnostics, like speed tests, can also help catch problems early.
Read More: Technology Falcon
FAQ’s
How to fix DNS address not being found?
Restart your router, clear DNS cache, and try switching to Google DNS for a quick fix.
How to fix DNS address could not be found on HP?
Reset your network settings and update the network adapter driver from HP Support.
How to fix a DNS cache problem?
Open Command Prompt and run ipconfig /flushdns to instantly clear the cache.
How to solve DNS issues?
Use a trusted DNS like Cloudflare or Google, and keep your system and drivers updated.
How do I reset my DNS?
Run netsh int ip reset and netsh winsock reset in Command Prompt, then reboot
Conclusion
Dealing with the DNS Address Could Not Be Found error can be annoying, but it’s usually easy to fix with a few quick steps like clearing your DNS cache, restarting your router, or switching to a more reliable DNS server like Google or Cloudflare.

I’m Rana Waseem, an SEO blogger with a passion for creating content that ranks and drives results. With a deep understanding of search engine optimization and keyword strategy, I help businesses and readers discover valuable information through well-researched, engaging blog posts. My goal is to simplify SEO for everyone while staying ahead of the latest trends in digital marketing